
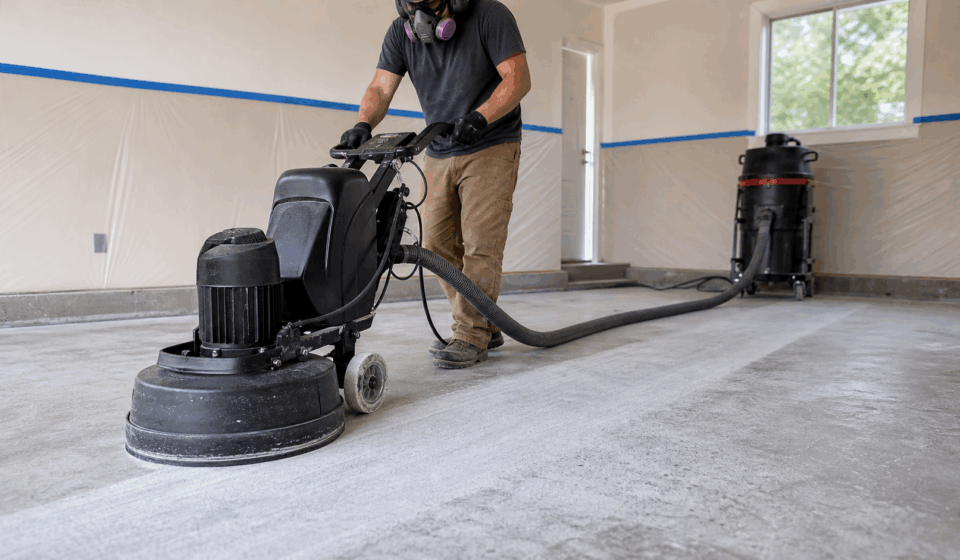

Surface preparation is the foundation of every successful concrete floor coating. Even premium resin will peel, blister, or wear unevenly when it is applied over dust, weak concrete, oil, moisture, or a surface that is too smooth. Preparation often takes longer than coating, but it is the work that determines whether the finish lasts for months or for years.
Table Of Content
Inspect the slab
Begin by identifying cracks, spalls, hollow areas, previous coatings, tire residue, grease, curing compounds, and signs of moisture. Note expansion or isolation joints; these are designed to move and should not automatically be filled with a rigid patch. If the concrete is soft or crumbling, the weak material must be removed until sound concrete is exposed.
Test for moisture
Concrete can look dry while moisture vapor moves through it from below. That pressure may create bubbles, whitening, or loss of adhesion. Use the moisture test required by the coating manufacturer, especially in basements, ground-level slabs, and buildings without a confirmed vapor barrier. If readings exceed the product limit, use an approved moisture-mitigation system or correct the source before coating.
Remove contamination
Oil and silicone are especially difficult because they can migrate deep into concrete. Start with a suitable degreaser and repeated rinsing or extraction. A dark stain may remain after cleaning; the important question is whether the surface still repels water or feels greasy. Do not grind oily concrete before removing as much contamination as possible, because grinding can spread residue across the slab.
Create the correct surface profile
Most high-performance coatings need mechanically prepared concrete. Diamond grinding is common in garages and residential interiors because it removes laitance and opens the surface with controlled dust when connected to a proper vacuum. Shot blasting is efficient for larger commercial areas. Acid etching is less predictable and can leave salts or moisture behind, so it should only be used when the coating manufacturer explicitly permits it.
Repair cracks and defects
- Open static cracks as directed and remove all dust before filling.
- Use a repair material compatible with the planned primer and recoat window.
- Patch spalls and low areas without leaving feather-thin edges that can break away.
- Treat moving joints according to the system specification; rigid filler is not a substitute for an engineered joint detail.
Clean and verify
After grinding and repairs, vacuum the slab carefully with suitable filtration. Pay attention to edges, corners, control joints, and the base of walls. The prepared concrete should have a uniform profile and should not leave powder on a clean hand. Avoid wet mopping immediately before coating unless the system allows it and the slab has enough time to dry.
Control the environment
Check slab temperature, air temperature, humidity, and dew point. A cold slab can slow curing, while a warm slab can shorten working time. Condensation may form when the slab is near the dew point even if the room feels comfortable. Keep doors, direct sunlight, dust, insects, and wind under control during application.
Plan before mixing
Lay out mixing stations, roller paths, edges, flakes, and exit routes before opening the containers. Confirm the exact mix ratio, induction time if required, pot life, coverage rate, and recoat window. Divide the floor into measured sections so each batch is spread at the intended thickness.
Final preparation checklist
- The slab is sound and any incompatible old coating has been removed.
- Moisture readings are within the system limit.
- Oil, wax, silicone, dust, and curing compounds are gone.
- The surface profile matches the product data sheet.
- Repairs are cured and compatible with the coating.
- Temperature and humidity are acceptable for the full application and cure period.
Preparation is not an optional upgrade; it is part of the coating system. When a floor fails, the bond line usually tells the story. Investing in testing, cleaning, profiling, and repairs is the most reliable way to protect the material and labor that follow.